Add Client Route
In the previous chapter, we learned how to create UI components and add styles.
In this chapter, we will learn how to add Client Route.
Previously we have added the Archive button to the point of contact list, next we add a route /archives, when accessing this route, only the point of contact of the saved file is displayed, while the original / continues to display all points of contact.
Create a new src/routes/archives/page.tsx file:
Add the following code:
The Helmet component of React Helmet is used here, and the Helmet component is also added in src/routes/page.tsx:
Modern.js integrates react-helmet by default, and can also be used in conjunction with SSR to meet SEO needs.
Since there are multiple pages now, all of which need to use the previous Utility Class, we need to move the style file to src/routes/layout.tsx:
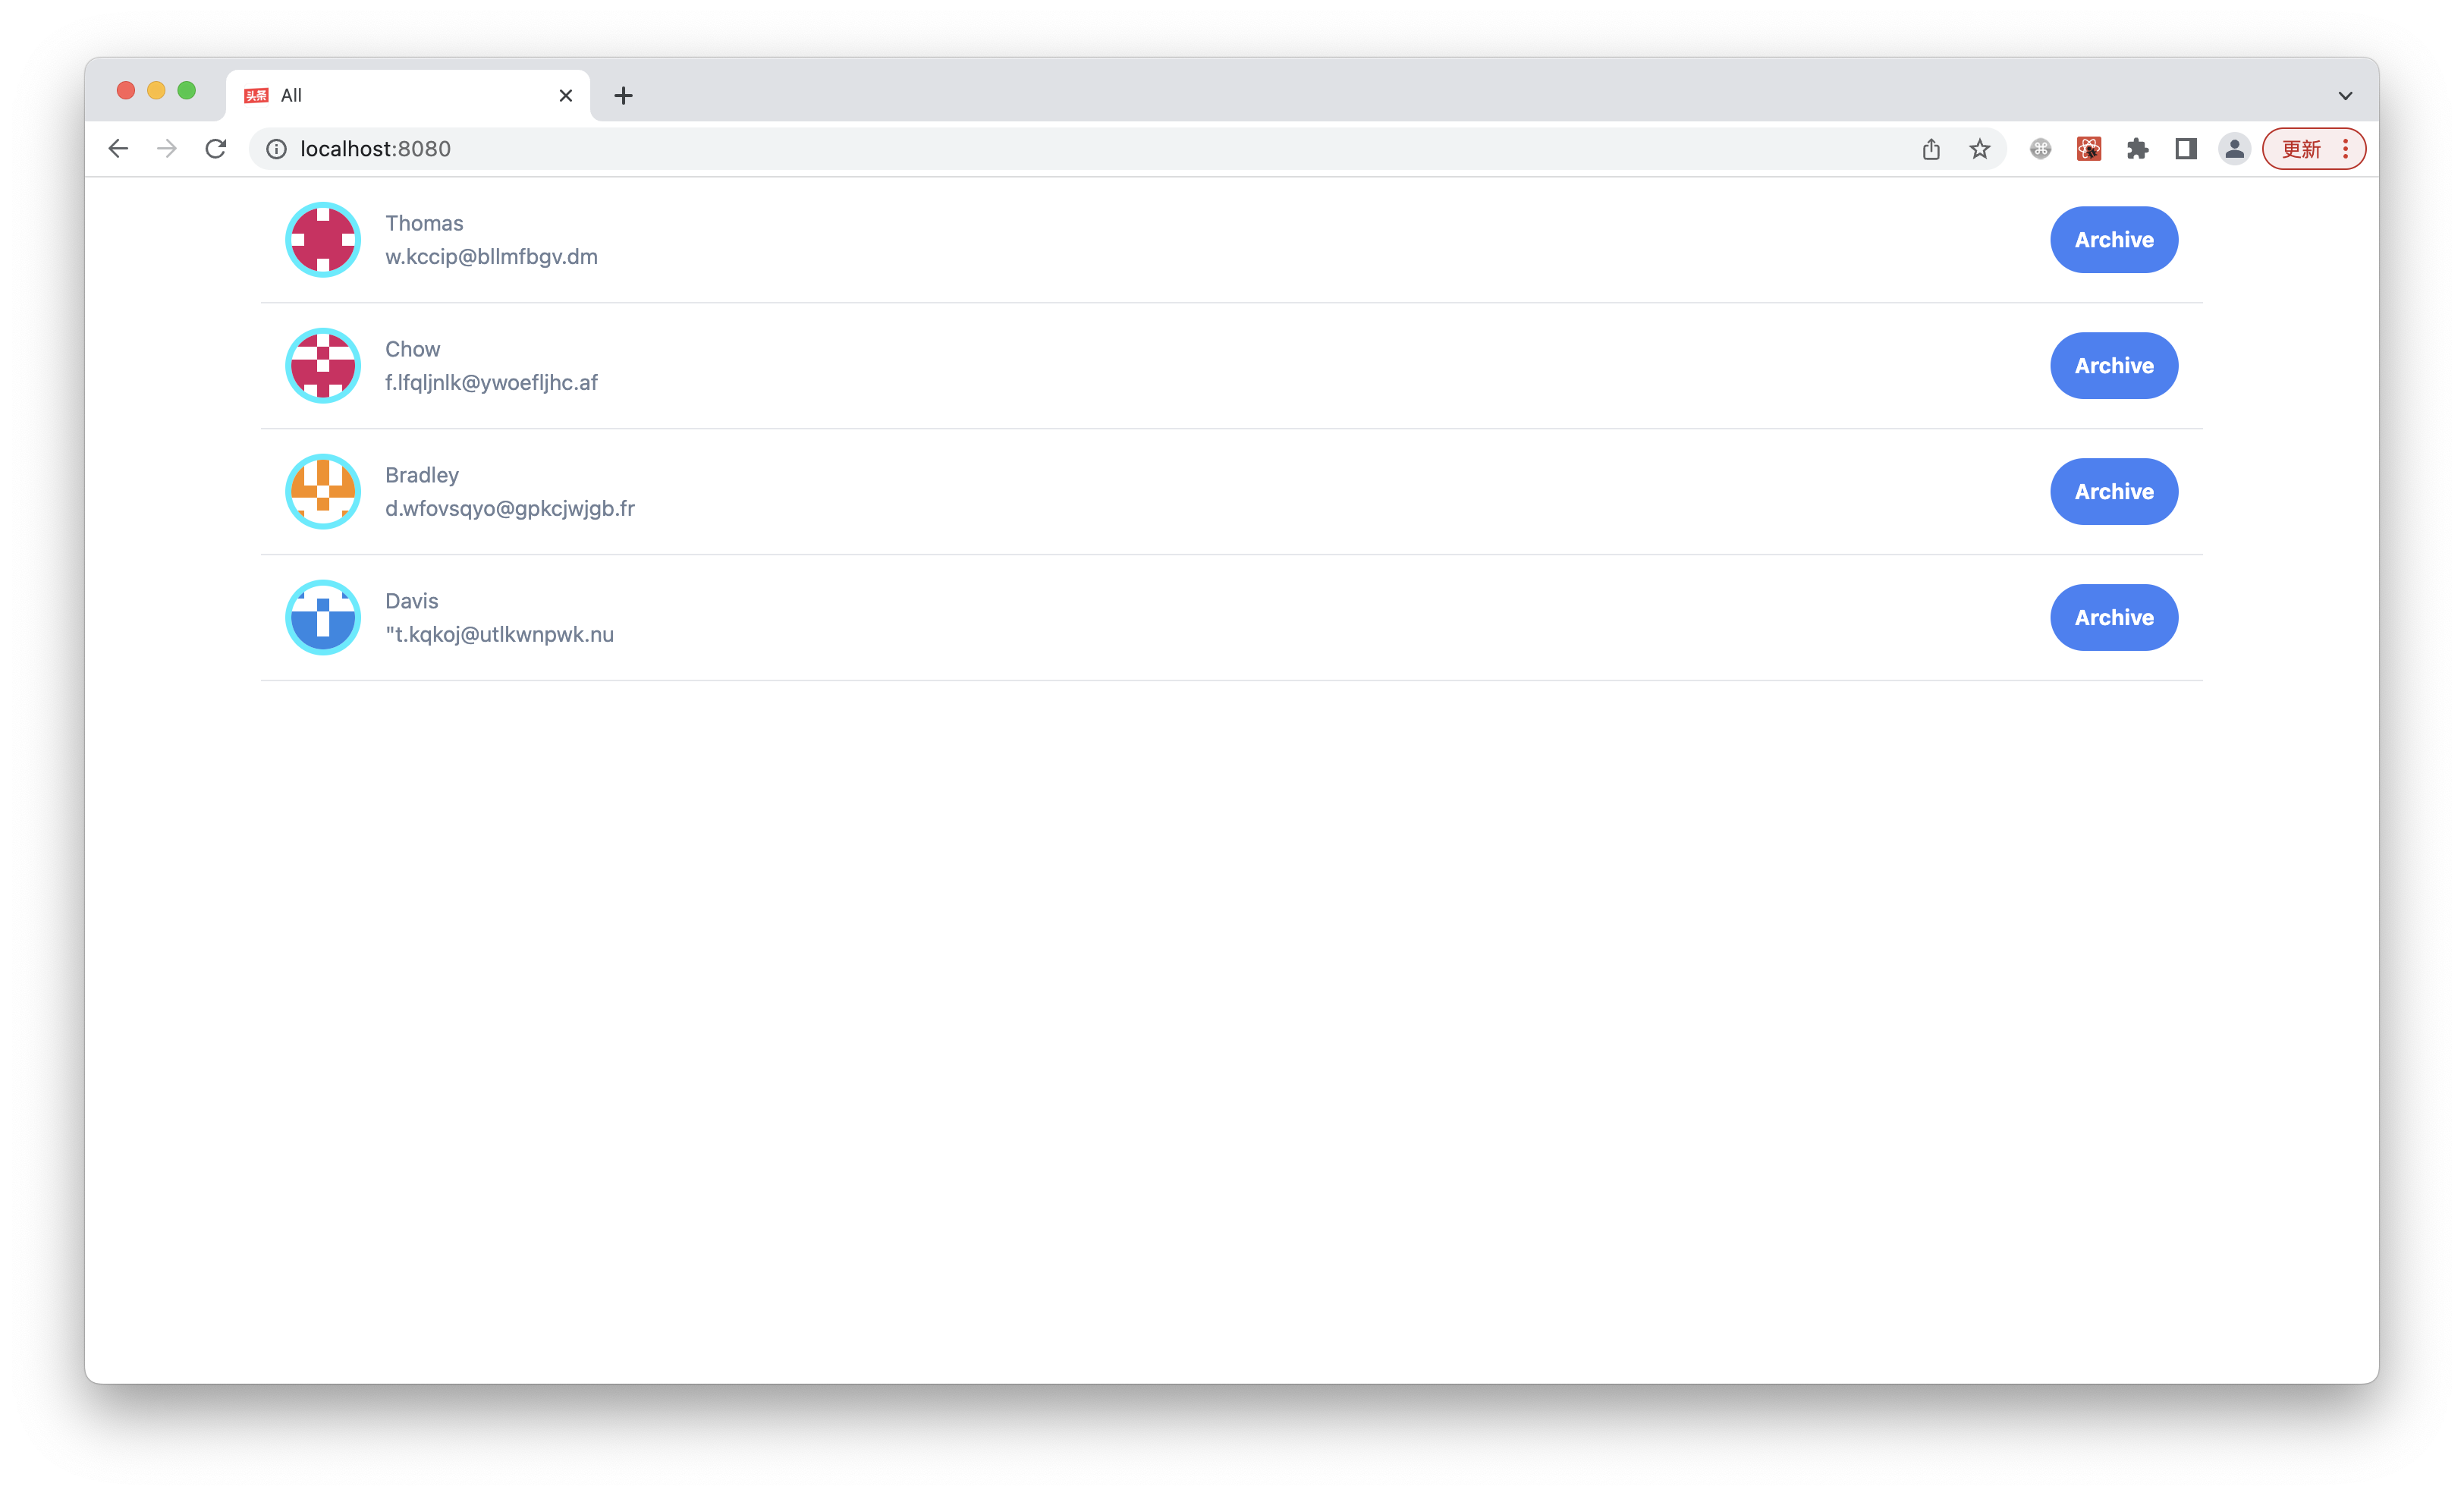
Execute pnpm run dev, visit http://localhost:8080, you can see the full point of contact, the title of the page is All:
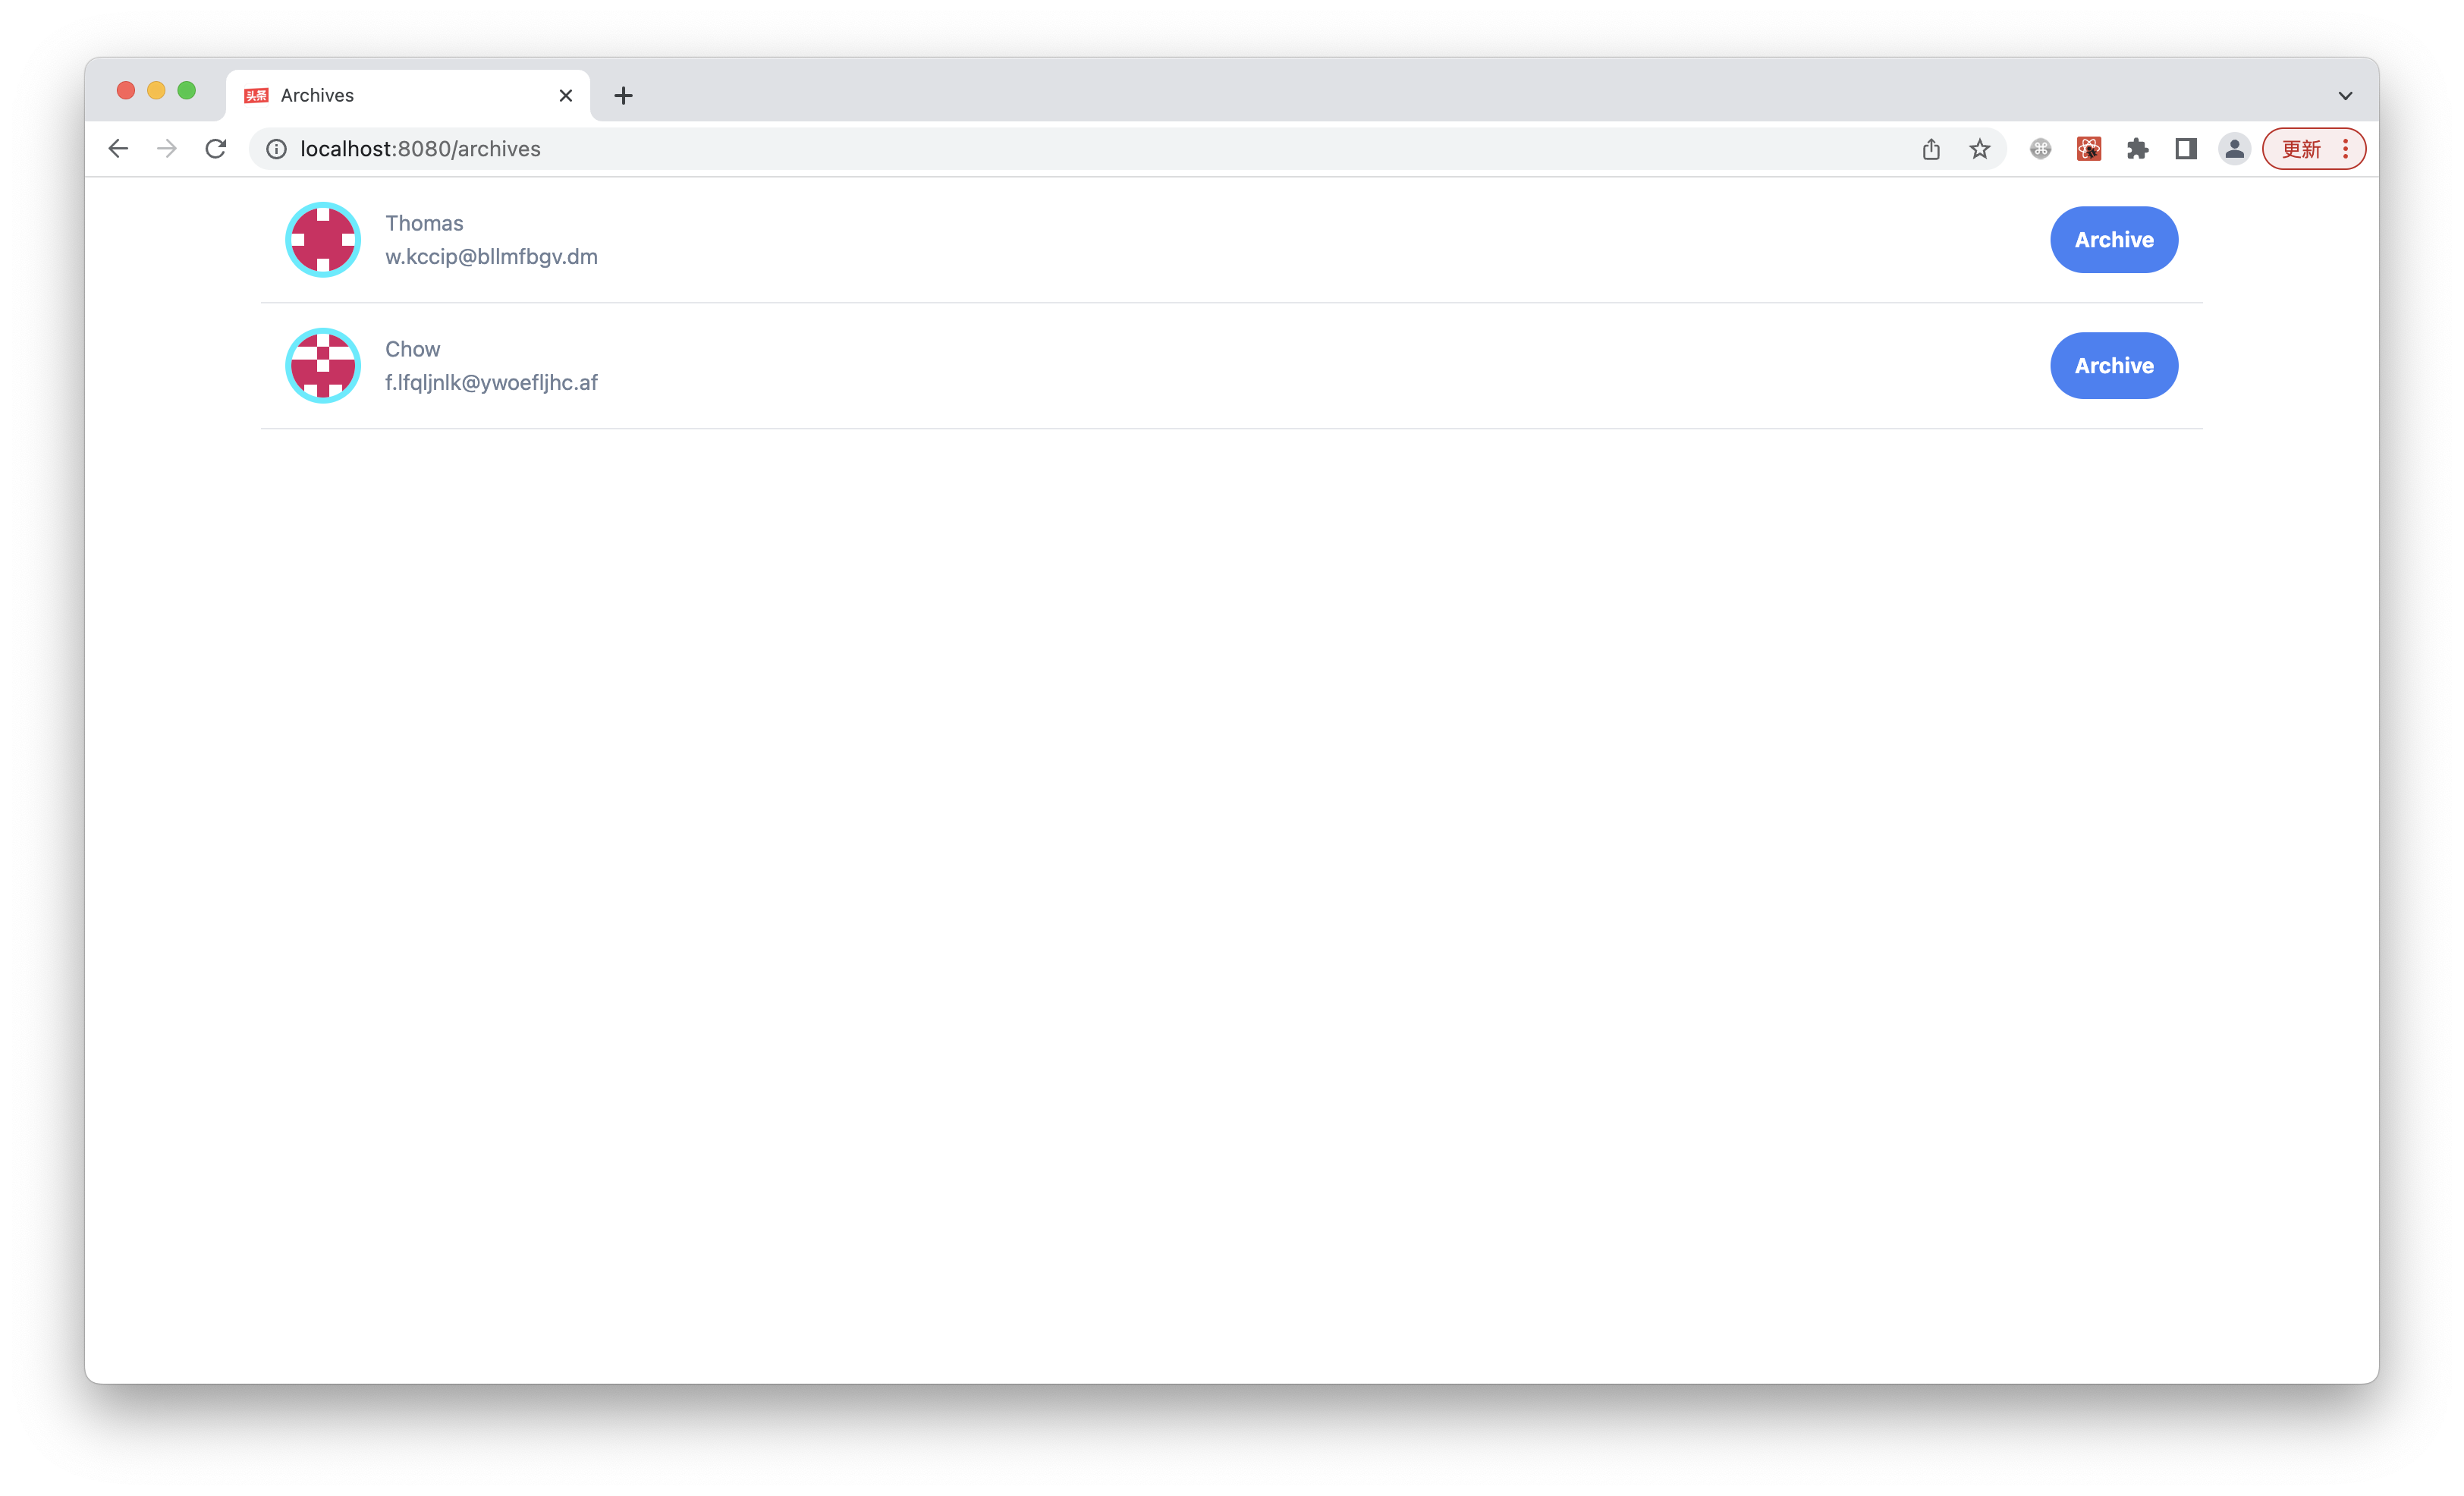
Visit http://localhost:8080/archives and you will only see the point of contact of the saved file with the title Archives:
Looking at the HTML source code of the page, you can see that the content of the two pages is the same, and different content is rendered for different URLs.
Next we add a simple navigation bar that allows the user to toggle between the two lists.
Open src/routes/layout.tsx and import the Radio component at the top:
Then modify the top of the UI to add a set of radio group:
Then we come to the implementation of currentList and handleSetList.
Introducing three React Hooks: useState and useNavigate and useParams, as well as Ant Design's event type definition:
Finally, add local state and related logic to the Layout component:
At this point, the page navigation bar implementation has been completed, and execute pnpm run dev to see the effect:
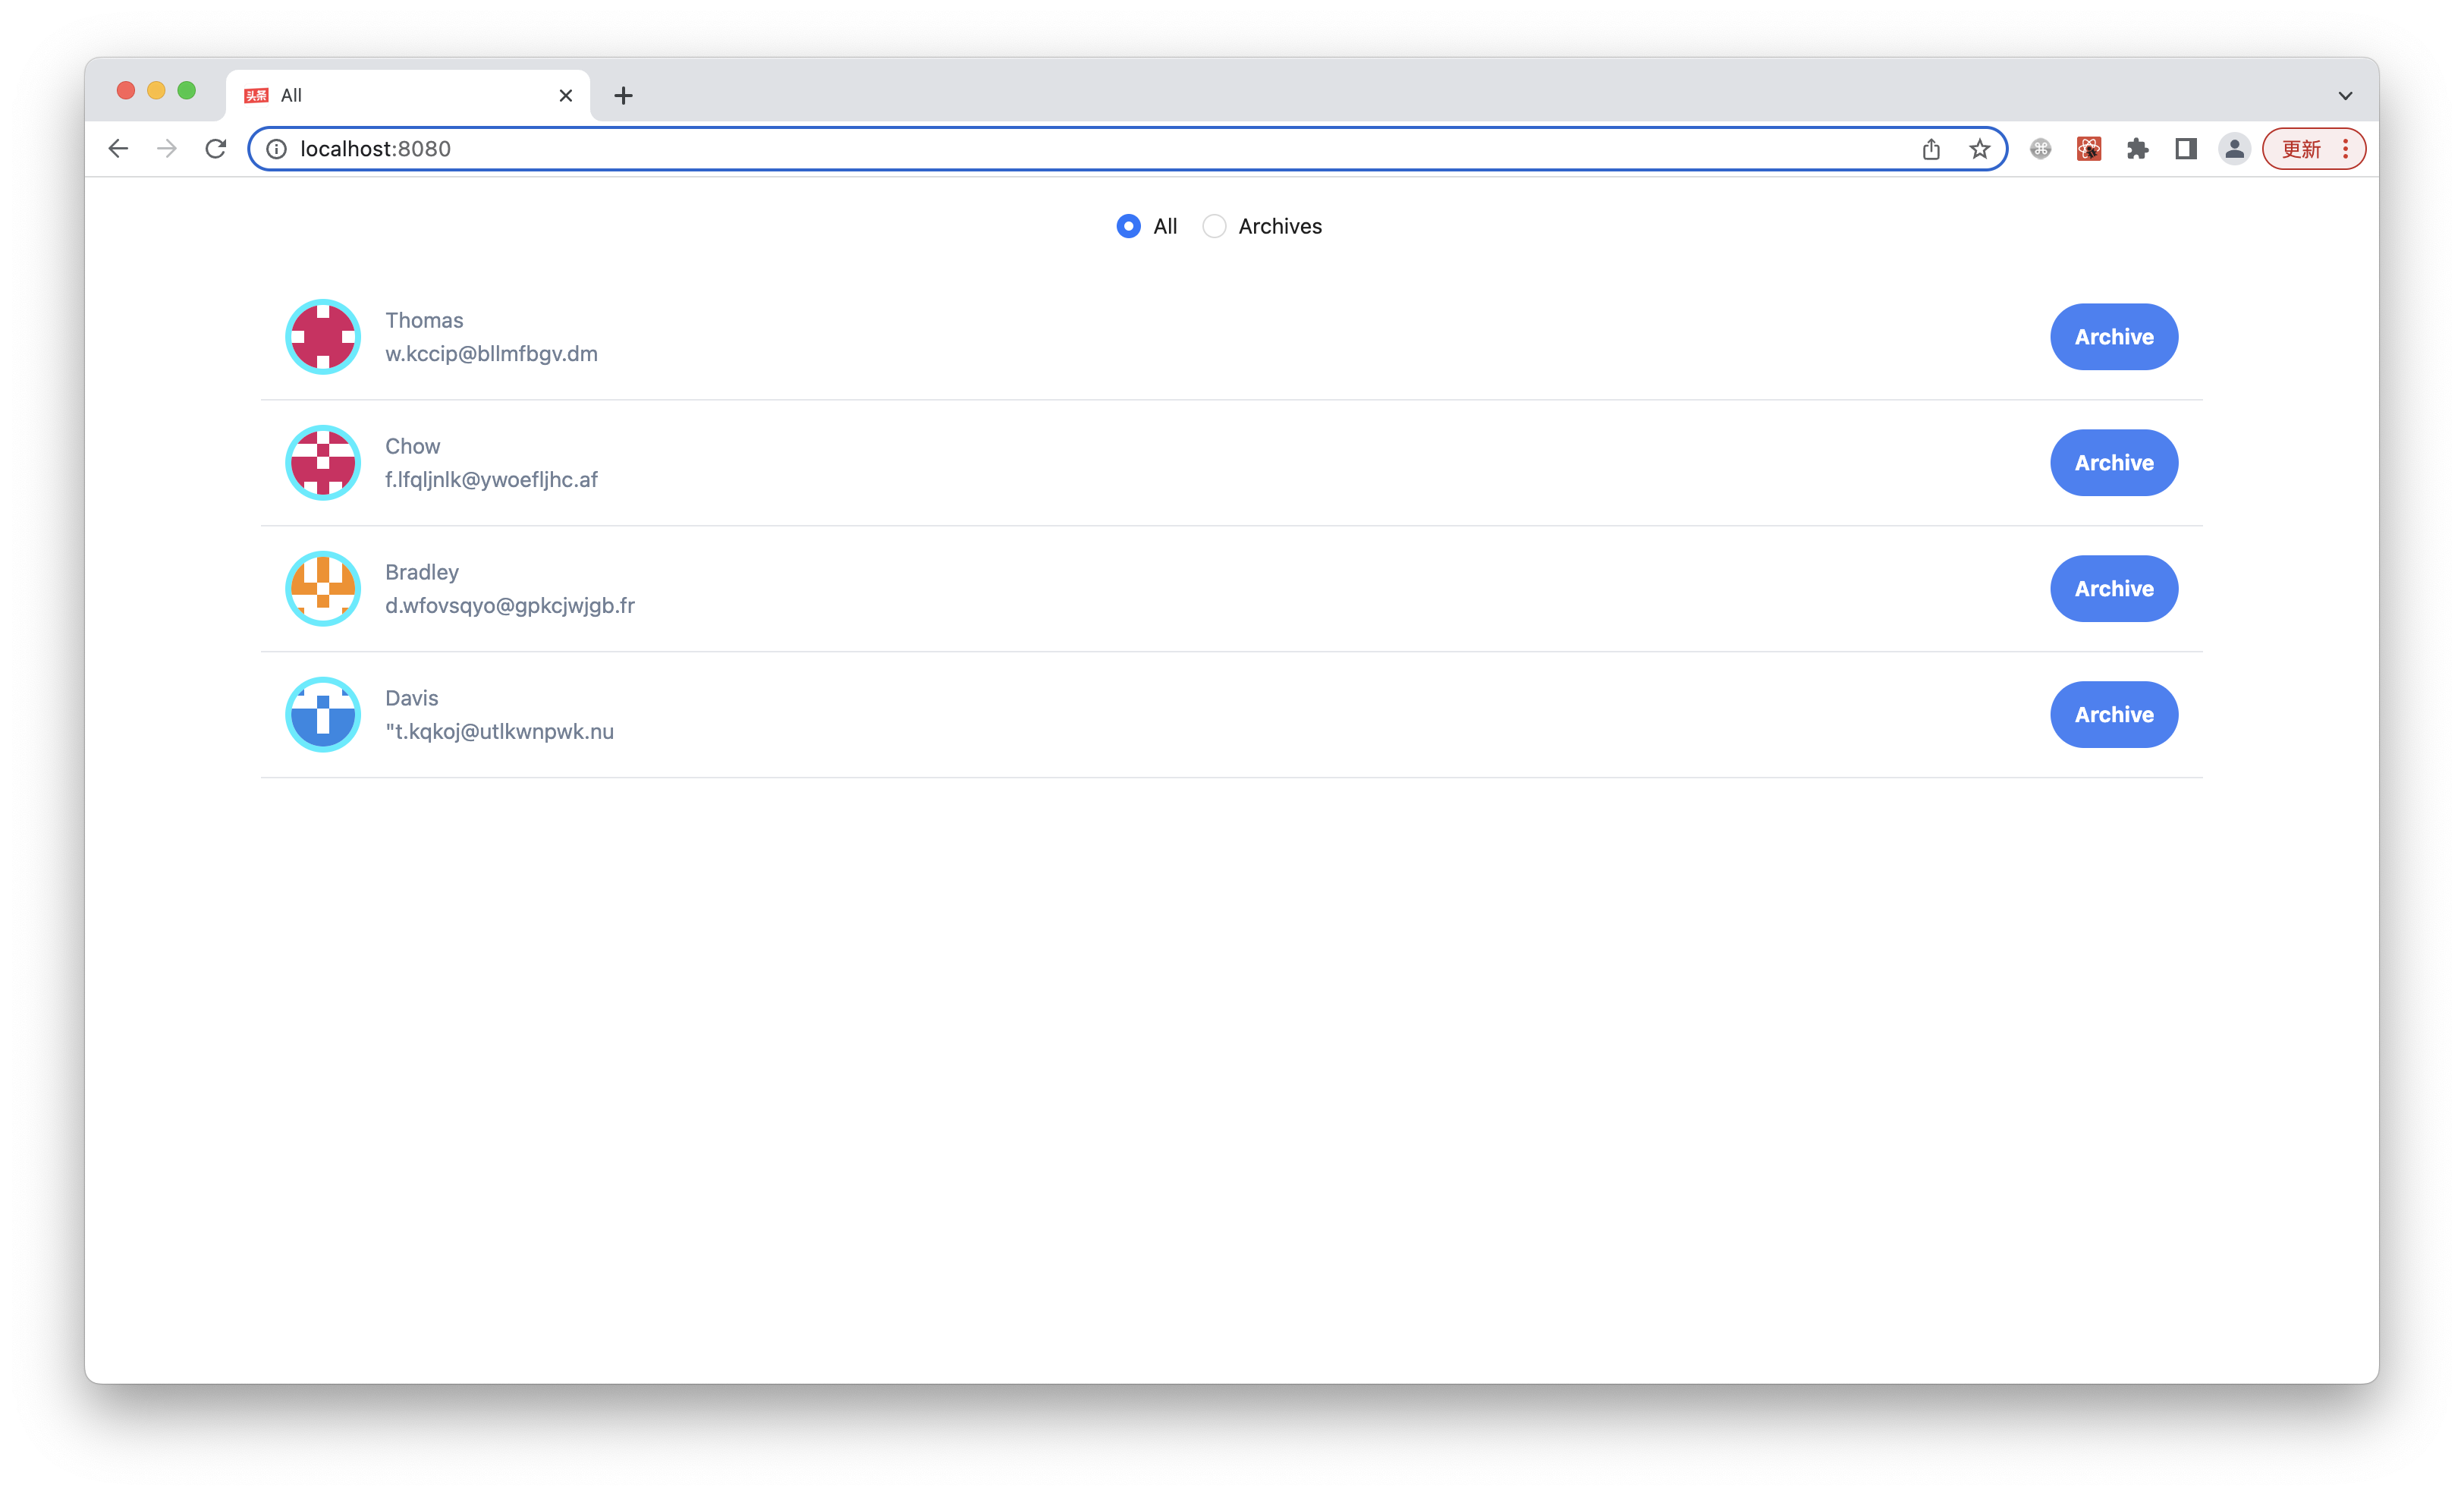
Click Archives in the navigation bar, you can see that the selected state and URL of the radio box will change, the page is not refreshed, only CSR occurs.
Accessing the two pages through the URL, you can see that the HTML content is different, because the page executes the logic of client routing in the SSR stage, and the HTML already contains the final render result.